Wednesday, May 22, 2013

Chinese Paper Cutting - 剪紙/ 剪纸

Over the weekend, I had a chance to learn basic Chinese paper cutting 剪紙 / 剪纸 (zin2 zi2 in Cantonese,  jiǎn ​zhǐ in Mandarin). We didn't learn anything really difficult, but it is a good introduction to learning paper cutting. Basically we end up cutting symmetrical designs. The designs become more intricate and fancy as the number of folds increases.

I remember when I was a child, I would follow my grandma to the garment factory or 衣廠 (ji1 cong2 in Cantonese, yi1 chang3 in Mandarin – I guess the term is the same in Mandarin) where my grandma worked in Chinatown, NY. To pass the time, my grandma would give me a piece of paper and ask me to snip triangles along the sides of the folded paper with a scissor. In the end, I made a lot of paper snowflakes in different variations. I suppose I had my  /  introduction early on in life.


What we actually learned recently in class is how to create the Chinese characters: (ceon1 in Cantonese, chun1 in Mandarin) and (hei2 in Cantonese, xi3 in Mandarin). means spring. Chinese people typically hang a paper cut during Chinese New Year because Chinese New Year is the Spring Festival. or 雙喜/双喜 means “double happiness” where good things come in doubles. This paper cut is especially used and taped to the doors or walls during weddings since weddings represent the happiness of the bride and groom.

Unlike my other arts-and-craft projects on this blog, I will not be making a PDF file since this project is fairly easy to do and I am not expert enough to offer any valuable advice. Thanks to Hung, our Reading and Writing and Cantonese I and II instructor at ALESN, and his friend Sophia, for teaching us how to paper cut. Sophia even earned a certificate in paper cutting, which she proudly displays in the back of her portfolio.

Materials needed for paper cutting:

·         A sharp pair of small scissors is ideal.
·         Thin colored paper (origami paper works well too.)
·         Pencil
·         Eraser

How to make a paper cut:


Ideally, if you want to be traditional, red colored paper is preferred to scare away evil spirits. In my case, though, I used a piece of origami double-sided colored paper.

1)    Fold colored paper in half.


2)    Draw or stencil in (if you have a stencil) half of the  character on the inner side of the fold with a pencil. Please don't follow my ugly picture below. I was free styling. 


3)    Cut along the pencil line. If the rectangular spot on the bottom right, that is left-half of the  character, is too difficult to cut due to its small size, then try to cut like the number four, by cutting a triangle in the middle first and then snipping off the upper sides last.

4)    Erase the pencil lines. Open the paper up and wallah, you have a  paper cut!


 How to make a  paper cut:


Follow the instructions above except the sketch or stencil would look something like this:


In order to cut the two  boxes  in the middle, cut the whole stencil out first and then fold those  parts in half in order to cut . At least that is what I did in order to achieve a close-to- perfect cut.

The end result:


I colored mine blue because it was the only marker I had at the time. Leaving the paper white reminds me of a funeral.

We can continue making more characters as long as the characters are symmetrical though I guess pro cutters will know how to make a design even if the design is not symmetrical. I’m sure professionals also use an X-Acto knife to cut the paper as well.


After my fun day at ALESN, I went back to my grandma’s apartment and gave her my paper cut. Then, we had dinner. Coincidentally, during dinner time, my grandma and I watched an episode of the Hong Kong TVB series, Beauty at War aka War and Beauty 2 (金枝慾孽貳/金枝欲孽贰 – gam1 zi1 juk6 jip6 ji6 in Cantonese jin1 zhi1 yu4 nie4 er4 in Mandarin) where the two consorts Consort Yue (played by Sheren Teng) and Consort Dowager Shun (played by Christine Ng) were paper cutting in episode 18.


Screen captured from Gooddrama.net

After being upset, Consort Yue left with her finished paper cut of four beautiful characters: 榮華富貴 (wing4 waa4 fu3 gwai3 in Cantonese, rong2 hua2 fu4 gui4 in Mandarin), which means “glory and weath.”

Screen captured from Gooddrama.net
 Then, Consort Dowager Shun opened her own and she found out that she cut the wrong section and to her dismay, her character paper cut fell apart.


Screen captured from Gooddrama.net
*Sad Face*

Screen captured from Gooddrama.net
Well, I wasn't sure of the story line since I am not following this drama, but it was a real interesting scene. Hopefully, you won't have to go through this mishap. Happy paper cutting!


Thursday, April 25, 2013

Chinese Family Relationships: Overview

It’s been a while. I hope you haven’t been slacking off as a lifetime Chinese student. I was actually doing more research and draft articles for this blog, though unpublished at this point. Fear not, I shall not give up on this blog. If I don’t post in more than a month, please review the older posts in the meantime.

Lately, I have been researching the topic of Chinese family relationships or kinship  I have a large family on both sides, which allowed me the opportunity to really know my relational terms while growing up. I also learned that no matter how much Chinese you know, there is always something that Chinese people are unfamiliar with or have forgotten. That is why I believe Chinese learning is a life-long process and some topics or areas deserved to be reviewed once again.

In my researching process, I have spent four days reviewing two dictionaries and looking for relevant, standard terms just for the basic family alone. I searched for all the possible terms that existed, ignoring irrelevant slang, nicknames, titles, and other definitions. You may have called your sister a pig your whole life, but that term will not be included in my chart. I have also seen in TV shows where some rich people address their fathers based on their titles (teacher, CEO, President, etc.), which creates some distance between them, but that is simply not a normal or loving way to call one’s parent. Because I have American influences, I have gotten creative, calling my paternal younger uncle, Sukie, most of my life instead of the proper term, (suk1 suk1 in Cantonese, shu1 shu5 in Mandarin).

I will leave the creative naming up to you, my readers, but at the very least, you should know the basic terms. If you do come up with a nickname, I hope it is a respectful term. Family is so important in Chinese culture that it is rare that I hear somebody call their family members a derogatory name. If I do hear it, I would think the speaker is uncultured and of course, disrespectful. Sometimes, the more offensive a name is, the more the term indicates how close you are with a person, but the term should never be so offensive that it makes a person uncomfortable or embarrassed. My paternal older Aunt, who is a proud grandma, calls her grandson, 菠蘿 / 菠萝 (gam1 bo1 lo1 in Cantonese / jin1 bo1 luo2 in Mandarin), which literally means, golden pineapple. People would ask my Aunt how her  菠蘿 / 菠萝 is doing. In the end, the nicknames should be endearing.

If you saw the comprehensive PowerPoint slide that I made on the basic family, you would be surprised.

Here is a screenshot:


Therefore, I had to make a quick chart as well for standard semi-formal terms. I will try to pick the most standard terminology for the quick reference chart.


Relatives

When you want to indicate that a person is a relative, you may use the term:
親戚 / 戚 (can1 cik1 in Cantonese, qin1 qi5 in Mandarin)

If you want to refer to somebody as your close relative, you may use the term:
親人 / - (can1 jan4 in Cantonese, qin1 ren2 in Mandarin)

What is a Close Relative?

Close relatives usually comprise of your immediate family, your father’s brother’s family, and your paternal grandparents. Basically, if you share your last name with a relative, you are considered “closer” to that person than a person who does not share your last name. A lot of people are forward-thinkers and may reject a male-dominated philosophy and call every relative their “close” relative so the actual meaning of the term may depend on the person as well. My aunts, being female, would reject this philosophy as they consider themselves just as “close” as their brothers are to the family. I originally introduced you to the semi-traditional meaning. If we really want to be super traditional, your sisters are not considered one of the “close” family members since they will be married off one day (if not already). The original 六親 (six [close] relatives – luk6 can1 in Cantonese, lu4 qin1 in Mandarin) are father, mother, older brother(s), younger brother(s), wife (in today’s terms: spouse), and son(s). I can explain more by adding the Chinese characters, but this can be explored in another post.

Practice:

I hope you are at the Chinese level where you know how to say, “He or she is my…”
If not, here’s a quick run-down of the words:

Cantonese (spoken-colloquial):
 keoi5 hai6 ngo5 ge3…
He/she is my…

Please read and pronounce in Cantonese:

親戚.
親戚.

Answer: He or she is my relative.
keoi5 hai6 ngo5 ge3 can1 cik1.
keoi5 hai6 ngo5 can1 cik1. 

The possessive word, is omitted when the speaker is referring to his or her 親人. I will leave it up to you whether to include it or not and many people find it strange or unnatural to use the possessive particle for family members since you don’t technically possess or own them. You might or might not hear or see the possessive particle being used, but it is usually left out of the sentence.

我爸. keoi5 hai6 ngo5 baa1*4 baa1.
He is my father.
* = You may pronounce baa1 or baa4 for the first .baa4 is the more common pronunciation. 

If you want to be formal or polite – Cantonese (spoken-colloquial):
位係() ni1 wai2 hai6 ngo5 (ge3)…
This [classifier for person] is my…

Please read and pronounce in Cantonese:
位係我爸.

Answer:
This [classifier for person] is my father.
ni1 wai2 hai6 ngo5 baa1*4 baa1.

Mandarin:
ta1 shi4 wo3 de5…
He is my…

ta1 shi4 wo3 de5…
She is my…

The pronunciations for “he” and “she” are the same in Mandarin, but the Chinese character is different.

Please read and pronounce in Mandarin:
. ta1 shi4 wo3 de5 qin1 qi5.

Here is the Taiwanese/Cantonese-Written phrase:
親戚. ta1 shi4 wo3 de5 qin1 qi5.
She is my relative.

The possessive word, is often omitted when the speaker is referring to his or her . I will leave it up to you whether to include it or not and many people find it strange or unnatural to use the possessive particle for family members since you don’t technically possess or own them. You might or might not hear or see the possessive particle being used, but it is usually left out of the sentence. In the last example, 親戚... is used more frequently than 親戚... according to Google search results since a close relative is a general term and not referring to anybody specific. Then again, everything seems to be a preference. I personally prefer that you go with the general flow of society and omit the possessive particle when you are specifically referring to your close relatives.

我爸. zhe4 shi4 wo3 ba4 ba5.
He is my father.

If you want to be formal:

這位人. zhewei4 shi4 wo3 de5 qin1 ren2.
這位親人. zhewei4 shi4 wo3 de5 qin1 ren(Taiwanese traditional characters and Cantonese-written characters).

This is a general statement so I personally added the character.

Filial Piety

I won’t mention filial piety at this point because I feel like this is something that is generally known. A child should respect parents and respect elders. Perhaps I’ll write up a post about it at a later point.

Given Names

This topic might or might not be obvious, but a Chinese person would never refer to an elder or address an elder by their actual given name. Some people in the United States call their parents, aunts, and uncles by their actual name, but that is disrespectful in Chinese culture. Calling an older relative by their title and then name (e.g. Uncle Bob) is more respectful, but still disrespectful in Chinese culture when addressing relatives. This is especially true for business relationships where last names are used along with titles. With friends, it may or may not be an issue depending on the age and relationship between you and your friend. However, if you are in a situation where you have to clarify a relative’s given name, then it is okay to mention it as a name. If I am talking about my father, I would say, “My father’s name is ______.”

I could seriously go on and on about the Chinese family topic, but I will spare you for now. There is still so much we can discuss about family and family history. There is so much I want to tell you, but we will stop here for today. Look for my other similar topics in the future.

I will continue explaining family members in detail in future posts. I don’t have all the answers, but it’s a start!

Monday, February 18, 2013

Red Envelope Project: Red Envelope Lantern 紅包燈籠/紅包灯笼


Do you like this "lantern" 燈籠/灯笼 (Cantonese: dang1 lung4/ Mandarin: deng1 long2)? Do you want to make one?
This 燈籠/灯笼  is made out of "red envelopes" 紅包 (Cantonese: hung4 baau1, Mandarin: hong2 bao1)

Thanks to Helen Man and Tina Lee, instructors at ALESN, I was able to learn how to make such a beautiful flower ball decoration out of Chinese red envelopes.


I have attached a link here in case you want to download the FREE PDF file that I made for this project.

Otherwise, the online instructions are below! Enjoy!


Materials Needed:
24 Cardboard Pieces that can fit inside the red envelopes
24 Red Envelopes
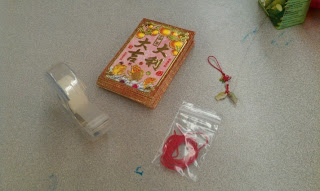
Red String
Chinese-Charms, keychain, or anything decorative for the bottom of your lantern

Scotch tape


Step 1: Preparation
Insert a cardboard piece into a red envelope. Leave the flap of the envelope open.
Do this for all 24 Red envelopes.
If you choose not to use cardboard, your lantern might come out flimsy in the end.

Step 2: Taping The Lantern
Line up six red envelopes vertically facing down.
Tape the envelopes together with the unclosed flap directly above the next envelope.
The picture on the left shows what the front should look like after taping.


Step 3: Taping The Lantern
Turn the row of six envelopes to face down again.
With the flap of the red envelope closed, place a new envelope with the back-side facing up and place it directly on top of the envelope that is furthest to your right. Tape the left side of the new envelope to the gap between first and second red envelopes on the right.
Next, repeat the process with a new envelope on top of the second envelope from your right except with the backside of the envelope facing down. Remember to only tape the left side of the envelope.
Repeat this step four more times, reversing the envelope sides each time, making sure all flaps of the new envelopes are closed.

You should have used 12 envelopes in total so far.


Step 4: Taping The Lantern
Set the whole project on its side, drawing out the second set of envelopes.
You should be able to match up the first two red envelopes on the right to make a triangle and tape them together.

Repeat with the third and fourth red envelopes and also with the fifth and sixth red envelopes.


Step 5: Taping The Lantern
At this point, the tip of the first triangle on the right should meet with the tip of the second triangle. Tape the tips together.
Leave the third triangle on the left alone.


Step 6: Taping The Lantern
Take out your red string and fold your red piece of string in half. Make sure the string is still long enough to go through your imaginary lantern and more for the loop at the top and to hang the charm at the bottom.
At the area where your folded your string, estimate how big your want the top loop of your lantern to be and tie a knot at the bottom of the loop.
Place your knot on top of the two triangle tips where you last scotch taped and tape the red string against where you previously taped to reinforce the red string to the middle of the lantern.


Step 7: Taping The Lantern
Tape the tip of the last triangle on the left to the middle of the lantern.

Close up the hexagon by taping the last end of the red envelope to the original first envelope.

 Your lantern should look like this so far.
You have just made the top half of your lantern!


Step 8: Taping The Lantern
Repeat steps 2 and 3 except that you are lining the envelopes horizontally and not vertically.


Step 9: Taping The Lantern
Repeat step 5 again, taping the right two triangles tips together.
At this point, it is easy to place the top of your lantern upside down, pulling the remaining red string upwards and taping it against the middle of the bottom half of the lantern, making sure that the vertical hexagon is also upside down. Close up the bottom hexagon. 


Step 10: Taping The Lantern
Reinforce the insides of the lantern with more tape, unless you like it loose.

It looks prettier when the angles of the top and bottom sides match up.


Step 11: Applying the Charm
Using the remaining string, tie the charm to the bottom of the string. You can cut off any remaining string or do something creative with the leftover string.


Wallah! We have a red envelope lantern!
Optional step: There are options such as rolling up some more envelopes vertically or horizontally and taping it to the sides of the lantern for a more Asian style.

Another option is to get a thin stick and attach it to the top of the lantern so you can hold it like a real lantern in the night for fun.

Friday, February 8, 2013

Red Envelope Project: Red Envelope Flower Ball 紅包花球


Do you like this "flower ball" 花球 (Cantonese: faa1 kau4, Mandarin: hua1 qiu2)? Do you want to make one?
This 花球 is made out of "red envelopes"  (Cantonese: hung4 baau1, Mandarin: hong2 bao1)

Thanks to Helen Man and Tina Lee, instructors at ALESN, I was able to learn how to make such a beautiful flower ball decoration out of Chinese red envelopes.


I have attached a link here in case you want to download the FREE PDF file that I made for this project.

Otherwise, the online instructions are below! Enjoy!


 Materials Needed:

30-pack of red envelopes
Scotch tape or a mini-stapler
Red string

Chinese-charms, keychain, or anything decorative for the bottom of your flower ball


Step 1: Making Creases/Preparation
Facing the front of the envelope, fold the envelope backwards in half from top to bottom 


 Step 2: Making Creases/Preparation

Open the envelope again to the original position and fold the envelope backwards with the left side of the envelope meeting the right side of the envelope.

Step 3: Making Creases/Preparation
Open the envelope again to the original position and this time fold the middle-crease at the edge with the middle crease-at the bottom. Folding the creases will create an imperfect triangle.
If you don’t want your flower ball to have any gaps, fold as close as possible to the creases. You can also use a ruler as a guide to fold the perfect crease.


 Step 4: Making Creases/Preparation
Repeat Step 3 with the other corners of the envelope.

Though, it is not necessary to press hard on the crease, I find that doing so makes it easier in crafting my flower ball during the scotch taping/stapling later on.

Step 5: Making Creases/Preparation
Repeat Steps 3-4 with the other 30 envelopes

You can do it!

Step 6: Taping/Stapling the Ball
At this point, you can either use scotch tape, a mini-stapler, or any other tool that would allow you to permanently hold two pieces together in order to begin constructing the flower ball.
Personally, I enjoy using scotch tape so that the staples wouldn’t show on the ball.

Take two red envelope pieces and tape/staple the top upper corner flap together.
If you are taping, use half of piece of tape on one side of the triangle flap along the crease and then fold the other half of the tape to the other side to hold the two envelopes in place. Repeat with the other bottom side of the triangle.
If you are stapling, staple near the bottom corners of the triangle, one staple per side to hold it in place.


Step 7: Taping/Stapling the Ball
Repeat Step 6 three more times, each time connecting a new red envelope with the previous envelope.


 This is the end result.
A star. The top of your ball.
5 pieces used so far.
If you find that you have a big hole in the middle of your star, try to fix it so that it is closer together. We will need to put the red string through this hole, but we don’t want it too large.

If you find that you messed up, you can always use a pair of scissors/stapler remover to undo the tape and staples and then redo the problem areas.

Step 8: Taping/Stapling the Ball
Now, it is time to add five more red envelope pieces to the star. This time, turn your new red envelope piece sideways and match up the flaps with the star. Again, tape or staple the flaps together.


 This is the end result.

You will start to see that your flower ball is becoming 3-D. If you use larger red envelopes, it could be as big as a hat.

 Step 9: Taping/Stapling the Ball
Put your existing flower ball aside.

Using new two red envelopes tape or staple the bottom corner together.

 Step 10: Taping/Stapling the Ball
Repeat step 9 four more times to make a total of five sets.
 Step 11: Adding the Red String
Now is a good time to add the red string. First, make sure your string is long enough to go through the lantern and more after your fold it in half. The length of the string is up to you, but you will need extra string to make a loop on top and to hook the charm on the bottom.
Fold your string in half.
Determine how big of a loop you want for hanging your lantern and create a knot at the bottom of your loop. I also recommend making four extra knots on top of the knot to make the knot way bigger than the hole in the middle of your flower ball. That way, the knot won’t go through the hole in the ball.

As you can see, I chose to make a big loop.

 Step 12: Adding the Red String
In the underside of the ball, place a piece of tape over the knot to secure it in place.

I like to add extra pieces of scotch tape to the knot for further reinforcement. Fixing the string after the ball is already constructed would be a hassle.

 Step 13: Taping/Stapling the Ball
Now is the time to add the new red envelope pieces from step 10.
Line up two side ball flaps with the bottom of the new red envelope piece. Tape or staple the flaps.
Repeat this step four more times with the other pieces from step 10 as you go around the ball.

Make sure the bottom of the red string isn’t accidentally taped or stapled in between flaps.

 Step 14: Taping/Stapling the Ball
After adding the side pieces from step 10, you may have noticed that the side flaps are not taped like the example flap at the bottom of the example picture on the left.

Go ahead and tape the five side flaps.


Step 15: Taping/Stapling the Ball
Now, we are ready to start on the bottom half of the flower ball.
Repeats steps 8-6 again backwards, except this time, it may be easier to just tape each piece to the flower ball instead as you go along.

Basically, you are attaching a row of five horizontally first (as seen in the pictures) and then the last row of five vertically again.


Step 15.5: Taping/Stapling the Ball
We are at the final stages of the flower ball.
Tape or staple the last five corners vertically.

Remember to make sure the red string is not accidentally taped or stapled in between flaps.


Step 16: Taping/Stapling the Ball
Carefully tape or staple the last flap corners, making sure the red string ends up in the middle (hole).

At this point, you can tie a piece of charm or decoration to the bottom part of the string in any way you would like.

It’s best to keep the flower ball light.


Wallah! We have a flower ball!


Update cookies preferences